UWPアプリ向けのPrism 6がリリースされました。
使い方はWindows 8.1ストアアプリ向けの"patterns & practices: Prism for the Windows Runtime“と変わっていないようです。
そこで、Prism 6 for UWPを使ってUWPアプリを作成する方法をまとめていきます。 サンプルコードは以下で入手可能です。
PrismForUWPSample/01-Basic/01-01-PrismBasicApp
Prismアプリの基本形(DIなし)
まず基本形として、DI(Dependency Inject:依存性注入)を管理するUnityを使わないPrismアプリを作成します。 実際にはViewとViewModelの依存性を管理するUnityを使ってPrismアプリを作成することが多いですが、それを使わない場合を見ていきます。
プロジェクトの作成
VS2015のWindows>ユニバーサル>空白のアプリ(ユニバーサルWindwos)テンプレートからプロジェクトを作成します。
NuGetでパッケージ追加
NuGetでPrism.Core、Prism.Windowsをインストールします。
App.xaml、App.xaml.csの修正
App.xamlを修正して、PrismApplicationクラスを継承するようにします。
App.xaml
<prism:PrismApplication
    ...
    xmlns:prism="using:Prism.Windows"
    ...
</prism:PrismApplication>
App.xaml.cs
基底クラスをPrismApplicationに変えてから、OnLaunchApplicationAsyncメソッドとOnInitializeAsyncメソッドを作成します。 後者ではPageとViewModelの対応付けを登録します。
using Prism.Mvvm;
using Prism.Windows;
using PrismApp1.ViewModels;
using PrismApp1.Views;
using System.Threading.Tasks;
using Windows.ApplicationModel.Activation;

namespace PrismApp1
{
    public partial class App : PrismApplication
    {
        public App() : base()
        {
            InitializeComponent();
        }

        protected override Task OnLaunchApplicationAsync(LaunchActivatedEventArgs args)
        {
            NavigationService.Navigate("Main", null);
            return Task.FromResult<object>(null);
        }

        protected override Task OnInitializeAsync(IActivatedEventArgs args)
        {
            ViewModelLocationProvider.Register(typeof(MainPage).ToString(), () => new MainPageViewModel(NavigationService));
            ViewModelLocationProvider.Register(typeof(UserInputPage).ToString(), () => new UserInputPageViewModel(NavigationService));

            return base.OnInitializeAsync(args);
        }
    }
}
Viewの作成(メインページ)
まず、MainPage.xaml, MainPage.xaml.csを削除します。
次に、Viewsフォルダを作成して、MainPage.xaml(とcsファイル)を作成します。 このとき、VS2015でViewsフォルダで追加>新しい項目と選択して、 空白のページを追加します(XAMLビューは違うので注意)。
<prism:SessionStateAwarePage
    x:Class="PrismApp1.Views.MainPage"
    ...
    xmlns:prism="using:Prism.Windows.Mvvm"
    prism:ViewModelLocator.AutoWireViewModel="True">

    <Grid Background="{ThemeResource ApplicationPageBackgroundThemeBrush}">
        <StackPanel VerticalAlignment="Center">
            <TextBox Text="{Binding Text, Mode=TwoWay}"/>
            <StackPanel Orientation="Horizontal" HorizontalAlignment="Center">
                <TextBlock HorizontalAlignment="Center">年齢:</TextBlock>
                <TextBox Text="{Binding Age}"/>
                <TextBlock HorizontalAlignment="Center">歳</TextBlock>
            </StackPanel>
            <Button Content="設定画面へ移動" Command="{Binding NavigateCommand}" HorizontalAlignment="Center"/>
        </StackPanel>
    </Grid>
</prism:SessionStateAwarePage>
using Prism.Windows.Mvvm;

namespace PrismApp1.Views
{
    public sealed partial class MainPage : SessionStateAwarePage
    {
        public MainPage()
        {
            this.InitializeComponent();
        }
    }
}
ButtonのCommand="{Binding NavigateCommand}"は、ボタンが押されたときに呼ばれるViewModelのコマンドです。その内容を作成します。
ViewModelの作成(メインページ)
ViewModelsフォルダを作成して、MainPageViewModel.csを作成します。
using Prism.Commands;
using Prism.Windows.AppModel;
using Prism.Windows.Mvvm;
using Prism.Windows.Navigation;

namespace PrismApp1.ViewModels
{
    public class MainPageViewModel : ViewModelBase
    {
        private INavigationService navigationService;

        public DelegateCommand NavigateCommand { get; set; }

        public MainPageViewModel(INavigationService navigationService)
        {
            this.navigationService = navigationService;

            NavigateCommand = new DelegateCommand(() => navigationService.Navigate("UserInput", null));
        }

        private string text;
        [RestorableState]
        public string Text
        {
            get { return text; }
            set { SetProperty(ref text, value); }
        }

        private int age;
        public int Age
        {
            get { return age; }
            set { SetProperty(ref age, value); }
        }
    }
}
2個のプロパティTextとAgeは、画面の2か所のTextBoxにバインドされています。 そのうちプロパティTextはRestorableState属性が指定されていますが、 画面遷移でMainPageを離れるときに値を保存するよう設定するためです。
Viewの作成(遷移先ページ)
ViewsフォルダでUserInputPage.xaml(とcsファイル)を作成します
<prism:SessionStateAwarePage
    x:Class="PrismApp1.Views.UserInputPage"
    xmlns="http://schemas.microsoft.com/winfx/2006/xaml/presentation"
    xmlns:x="http://schemas.microsoft.com/winfx/2006/xaml"
    xmlns:local="using:PrismApp1.Views"
    xmlns:d="http://schemas.microsoft.com/expression/blend/2008"
    xmlns:mc="http://schemas.openxmlformats.org/markup-compatibility/2006"
    xmlns:prism="using:Prism.Windows.Mvvm"
    mc:Ignorable="d"
    prism:ViewModelLocator.AutoWireViewModel="True">

    <Grid Background="{ThemeResource ApplicationPageBackgroundThemeBrush}">
        <StackPanel VerticalAlignment="Center">
            <TextBlock HorizontalAlignment="Left">入力画面</TextBlock>
            <Button Content="戻る" Command="{Binding NavigateCommand}" HorizontalAlignment="Center"/>
        </StackPanel>
    </Grid>
</prism:SessionStateAwarePage>
using Prism.Windows.Mvvm;

namespace PrismApp1.Views
{
    public sealed partial class UserInputPage : SessionStateAwarePage
    {
        public UserInputPage()
        {
            this.InitializeComponent();
        }
    }
}
ViewModelの作成(遷移先ページ)
ViewModelsフォルダを作成して、UserInputPage.csを作成します。
using Prism.Commands;
using Prism.Windows.Mvvm;
using Prism.Windows.Navigation;

namespace PrismApp1.ViewModels
{
    public class UserInputPageViewModel : ViewModelBase
    {
        private INavigationService navigationService;

        public DelegateCommand NavigateCommand { get; set; }

        public UserInputPageViewModel(INavigationService navigationService)
        {
            this.navigationService = navigationService;

            NavigateCommand = new DelegateCommand(() => navigationService.GoBack());
        }
    }
}
ButtonのCommand="{Binding NavigateCommand}"で実行されるコマンドでは、
INavigationService.GoBackで元の画面に戻る処理を行います。
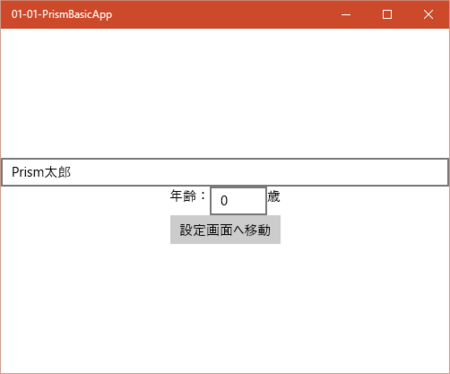
実行結果
デバッグ実行するとテキスト入力欄が2つある画面が表示されます。

それぞれに入力してボタンを押すと次の画面に遷移します。
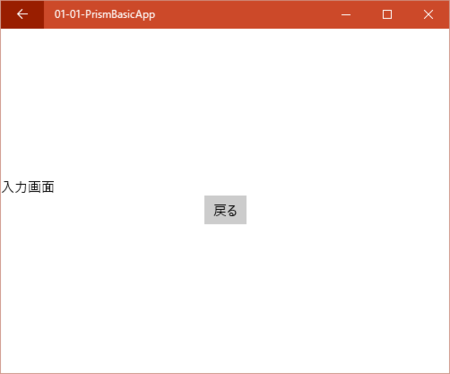
戻るボタンを押すとINavigationService.GoBackで元の画面に戻ります。 このとき、RestorableState属性を付けたTextプロパティの値が復元していることが分かると思います。